Bevy Jam #1 Postmortem
¿Quién es el Mechaburro? Postmortem
Hello everyone! Now that the game jam is over, I wanted to write out my thoughts and document how I made the game while it's still fresh in my mind. Full disclosure: I was too excited to get back into my normal routine after the jam and pulled my back while running (is that unusual??) so I'm quite literally stuck in bed with nothing else to do! Hopefully this turns out to be an enjoyable/informative? read though for anyone interested in making games with Bevy or game jams in general or just likes burros like I do.
I'll start with a little background about myself and what I've learned from previous jams, then talk about how I prepared for this jam and then a day-by-day timeline of how I made ¿Quién es el Mechaburro? while adding tips for game jamming specifically with Bevy throughout.
Previous Jam(s)
I've always wanted to make video games as long as I can remember. My first memory is actually of playing a video game so I'm sure that's like a core memory or something. Despite being terrible at math and having a degree in journalism, I eventually decided to just learn programming and make games. The first "game jam" I ever did was a month-long Holiday-themed jam where I made a 3-level game called "Greedy St. Nick" inspired by Binding of Isaac and Wolfenstein 3D. It was very low stakes, so while I completed a game, I wouldn't say I learned anything about "game jams" with it. Here's a clip of it:
I made it in Lua with the LÖVE engine and was pretty proud of it; I actually landed my first professional programming job with that game as my featured project on my resume!
Over the years I made little proof of concepts in different languages/tools but never really completed anything. I just never found a game-making tool that I actually enjoyed using until I found Bevy. Actually, it's only now that I'm writing this that I realize that I use Bevy very much the same way I used LÖVE: just a text editor.
After learning the ropes of Bevy, I set out to make a game with the goal of just finishing it and made Not Snake which was a blast and really sparked this game-making addiction I have now.
Anyway, the 2nd (or first "real") game jam was for the Rusty Jam where I made A Day at the Movies and learned A LOT about making a game for a game jam. It was an eye-opening and stressful experience, but I did manage to submit something that was playable. Afterward, I had a lot of "if I could do it again, I'd try doing this instead," so, despite my initial hesitancy to do another jam, I wanted to also see if my "do this instead" tips were actually valid.
Tips for Jamming
I'll preface this by saying I'm not super experienced at jamming and that these are just random thoughts I kept in mind that I believe helped me stay on the target I set myself at least this time. I don't know if they're obvious or not but I figured I'd write them down here and see if people agree or disagree.
I'll also sprinkle the tips in this post where it makes sense rather than listing them all right here, but obviously the biggest tip in my opinion is
MANAGE YOUR SCOPE
This should be a constant mantra in your head as you're working on a jam. It's really, really easy to let your scope creep but if your goal is to have a "finished" game, you really need to constantly cut your scope down and keep an eye on it because it'll double in size almost instantly.
I should also stress that not everyone will share this same goal and maybe you want to really push yourself in some other aspect or maybe specifically to expose you to a new tool and that's totally OK too! These tips are largely based on what (I think?) worked for me specifically to finish a game keeping in mind my very limited experience of game jamming.
Preparations
One big thing I noticed during the Rusty Jam is how much extra stuff there is outside of making a game. I definitely setup my games to just drop me right into the action while developing to make it easy to iterate on things and get a game up and running more quickly, but there is so much extra stuff around a game that should also be taken into consideration (at least in my opinion). Granted, it depends on the rules of the game jam (for this one, rule #3 is "You are allowed to reuse assets and code, provided what you build is novel."), but if it's allowed, you should consider this like assembling your tools prior to getting started on a project without knowing exactly what you'll be making.
MAKE A TITLE SCREEN AND A PAUSE SCREEN
I feel like this is a smallish task that is very similar across games so it can be made in a reusable way but also adds so much to the experience. While making Mechaburro I started with a title screen with two buttons: Start and Quit, and a Pause screen with two buttons: Continue and Quit (these are largely what I did for Not Snake and Day at the Movies). I kept considering adding more but then cutting the scope back and ended up with the same two options.
But even still, it instantly adds a level of polish to your game which seems a little silly for such a small piece that kinda sits outside of your game. I like to think of it as a title page or a cover of a book; "don't judge a book by its cover" but you know everyone does.
My recommendation is to either keep a small project that has the bones of a menu in place or at least take a look at some of the Bevy examples on UI and State to know how you'd approach it ahead of time if you're doing a jam that has a very strict "no re-using code" rule. Also, definitely also use the Bevy cheatbook to help grasp things.
KNOW HOW YOU'LL BUILD YOUR GAME
This was probably the biggest stress-causing part of my previous jam. I had setup some stuff previously for Not Snake and totally didn't think about it until later on and then ran into the ceiling of Github's free builds and had to figure out how to build the WASM version locally and then I also couldn't get the music to work at all. I ended up submitting the game without music and was completely stressed out. It was only later that I learned this happens to everyone on their first jam.
All this stress is very easy to avoid if you prepare beforehand. Bevy currently supports Windows, Linux, MacOS and WASM for browsers so it's not impossible to build your game across all four platforms, the main problem is building for platforms you don't have access to. I make my games on a laptop from 2015 that has a flavor of Ubuntu on it; I do have access to Mac and Windows but I also happen to be pretty lazy.
Luckily, if you happen to be using Github to store your source code (which, I'd highly recommend), you can use Github Actions to do all the building for you. I'm no CI/CD expert, but there is an excellent example under Bevy's github here made by François that makes it super easy to get up and running with multi-platform builds. You can experiment with it on a private repo just to make sure it's working and then just setup your game jam game the same way.
For Mechaburro, I started out with the template, configured it for my game and then aimed to push it to github each day mostly to ensure it was still building. There were a couple times it failed but re-triggering the build on github would then build it successfully. The template will run clippy on each commit you push and will build on each git tag you add. Here are the commands for adding tags and pushing to github after you've made a commit
git tag -a 1.0.0
git push
git push --tags
That's mostly what you would need. That also leads me to my next tip.
TURN OFF CLIPPY TREATING WARNINGS AS ERRORS
This probably goes without saying but this is a game jam, not NASA flight code. You don't need to put that pressure on yourself to make perfect code. Feel free to look at the warnings and decide if it's worth following or not, but don't waste time breaking up that 17-parameter function or "reducing the complexity" of Bevy queries. I like to think of it like a trained chef working in a restaurant vs going on one of those food competition shows: corners will be cut, ingredients will be wasted and the kitchen will be a mess but the goal is to make one plate quickly not run a whole night's worth of orders.
Also, as mentioned above, the other aspect I had trouble with was audio which was devastating after I had spent time actually making music that didn't make it into the game. So the next tip is
ASSETS AND INPUTS
You should know how you're loading your assets, how you'll play/display them and how you'll be handling player input. These are all things that you can handle similarly across games once you've learned them or designed how you want to handle them. You don't want (or need) to stumble over handling input event issues or browser compatibility with audio files during the jam, you want to already have those issues dealt with so you can focus on making the game.
LIMIT UNKNOWNS
This might make more sense after the theme is announced but avoid designing a game that is too different from what you've made before (again, keeping in mind your goals, this may not matter as much to you). For this game, most of the stuff that I hadn't done a lot of before revolved around asset making, using Bevy Scenes and using an input plugin. I didn't want to spend too much time looking things up or prototyping. This also makes it easy to keep your scope down and limit your game design options which helps move forward when you have an open-ended theme. It's easy to throw out good ideas with the reasoning being it'll risk the whole game. Which leads to the next tip:
SAVE IT FOR THE NEXT GAME
If "manage your scope" is your mantra this should be the backing track. It's easy to toss out your good ideas when you write them down and save them for your next game. Your game will need a sequel one day, won't it?
The last thing you should prepare for but not necessarily do until during the jam, is..
CREATE YOUR SUBMISSION'S ITCH.IO PAGE
It doesn't make sense to do this before the jam starts but it also makes even less sense to do this the day you're submitting. You don't have to make it pretty but you should at least fill out some basic information on it and start uploading your Github-built releases to it to both learn the workflow and test the WASM build of your game in itch.io. Keep in mind that Itch places your game in an iframe and has a number of additional settings that will alter how your game is presented. You'll have to play around with this to see what fits your game well, but you DON'T want to be dealing with this at the last minute.
After you've finished and submitted your game for the jam, then go back and fill out the rest of the page, make your devlogs 👀, and do what you'd like to make it pretty. This is another one of those things that is totally outside of your game and shouldn't really matter but also adds a level of polish. I know, I know, a good game should be able to stand on its own, and I 100% agree. But also, with that in mind, it's still difficult to avoid the biases of first impressions. All I'm saying is that you'll want to make the page early and then you can tweak and pretty it up after your game is done.
Theme and Game Concept
There were so many good themes submitted, it was personally difficult to look through because I'd start thinking of what game I would make for each theme. The top 3 were "Unfair Advantage", "Changing Rules" and "You Are Not the Main Character." I gotta be honest, I started looking at "Changing Rules" with fear because I could not think of anything with that. "Unfair Advantage" to me seemed like it could be interpreted in many ways so I wasn't too worried about it. And I started thinking about making a game where you're an Item Shop owner in an adventure game for "You Are Not the Main Character" that would maybe b part store management simulator and Zelda-like fighting when you catch someone stealing items. I thought at least it was something that I could work off of.
As we all know, Unfair Advantage was the theme picked which worked well for me as even now I still can't think of what I'd make for "Changing Rules." I'm still not entirely sure why I almost immediately thought to make a game about burros, but I have two theories. The first is that as a kid I played a card game called Burro with my family where the object of the game was to not be the burro and I remember lots of yelling "that's not fair!" between my siblings. The other thing is that I've been putting stickers on my workout water bottle to hide the existing logo that was printed on it and for months now I've been working out with a sticker of this dude staring me in the face, so I suspect there was some sub-conscious stuff going on.
The other thing is the game is a "twin-stick shooter" and that's mostly because, again, Binding of Isaac is one of my favorite games. My idea pretty quickly went to "twin-stick shooter with pinatas that shoot each other and one is randomly picked to be stronger." I wanted to have items that the players could pick up that would modify their burros and I also wanted the game to feature at least 3 types of gameplay to break things up: twin-stick shooter, a "pop-the-most-balloons" mode, and a race mode. Even several days into the jam, this still was my plan but I had to scale down my scope, unfortunately.
The other big influence I would say, even without the race mode, is Mario Kart. I thought a lot about how best to fit "Unfair Advantage" while not necessarily making a frustrating experience for the player but also not making it feel like the game is designed in their favor. Mario Kart famously has items that get distributed based on what place a racer is in and is usually criticized/admired for the "unfairness" that system produces. This isn't the part that influenced me though, it was actually how Mario Kart let's you keep playing when you lose.
Just like how Mario Kart gives you a set of four races and the overall winner is determined by who has the most points, I wanted Mechaburro to have an ongoing-score counter. My thinking was that paired with making the Mechaburro for each round be random would introduce the Unfair Advantage mechanic in a way that wasn't frustrating or overly-beneficial to the player.
I experimented a bit with what exactly the Mechaburro's benefits would be and also started writing down ideas for items that the Mechaburro would drop if it was eliminated early. I was planning on having items like shooting in multiple directions at once, ones that make a burro go faster or have a lower cooldown, and then a burro would carry that item for the rest of the game giving another layer of "unfair advantage," but unfortunately this too was something I just had to cut. I settled on making the Mechaburro be able to shoot "lasers" that travel faster and further than the regular burros' candies while also having a shorter cooldown period.
I had my idea though and so this is how I built it broken up by each day..
Day 01
Aside from the above planning, the first day I mostly focused on those initial tips of getting a build going, getting my assets setup and laying out the foundation work. While there exists good examples and this great plugin for asset loading, I've been somewhat iterating on the same asset loading file I've been using since Not Snake. I mentally picture it as ripping the file out and then re-writing it better each game to help the quality of the code over time across games, kinda like sharpening tools or something? I don't know if that's a great analogy. Either way, I recently learned about SystemParameters which lets you create a struct that can behave somewhat like a collection of the regular parameters you'd have in a Bevy system.
On its own this is pretty cool for simplifying function signatures; if you know that you're always going to access a group of queries together like "all my cameras" or "all projectiles along with their sources" or something, you can setup a SystemParameter to hold those queries and then use that as the parameter. 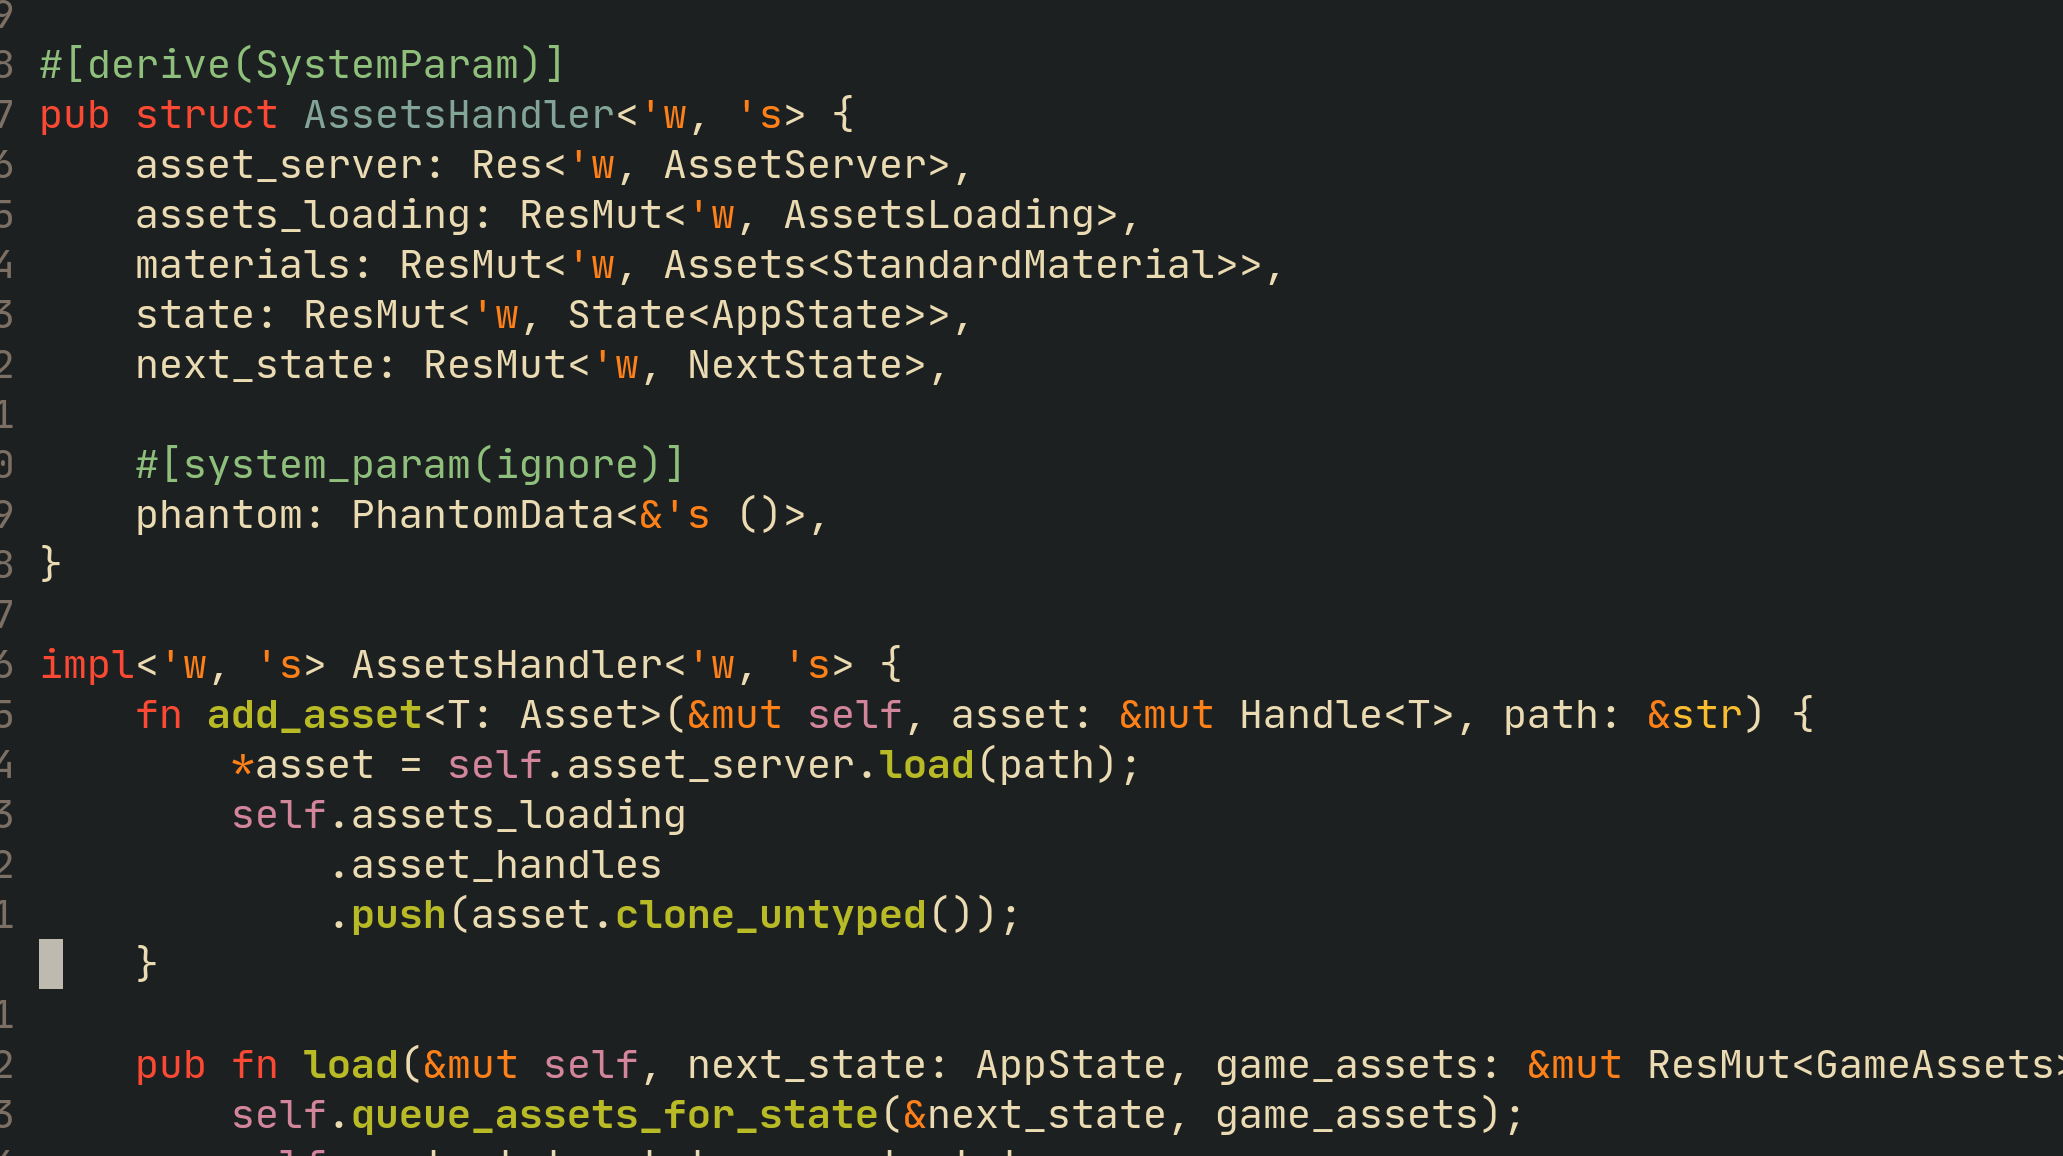
(Note: I had to add the PhantomData to make use of the 's lifetime which wasn't being used in any of the "parameters" I made inside this AssetsHandler)
Anyway, that on its own is cool but the other neat thing is you can create an impl for the SystemParameter struct. This lets you add functions on this struct that can reference those Queries/Resources/EventWriters/etc that you've defined in the struct. It can be super useful. So, for the asset handler I created a number of functions for adding different asset types and a load function that you pass the next State you want to be in and the AssetHandler takes care of calling functions to fetch the assets for that state, switches to a "loading" state where it waits until all assets are loaded and then switches to the State that you supplied. It could probably be simpler and more flexible, but I figured it would work well for this game and the structure of this stayed mostly the same.
The other piece I wanted to have for this game was one struct that stored the handles for all my assets. In previous games, I tried to have the handles for things on structs related to the thing and it started becoming a mess of parameters when I needed access to a number of handles across entity types (another great use case for a SystemParameter). For this game, I knew I'd only have a small number of different entities and felt that I could manage them all in one struct. The added benefit of this is that since I know I'm only going to be loading one level at a time, I can keep the number of distinct handles low and just point them to different assets as the levels change. For comparison, here's what the file ended up looking like by the time I finished the game. I got away with only needing one handle for the current level, one for the burro, etc. In my earlier Bevy days I definitely made a mess of handles everywhere.
Here's another tip:
KEEP IT SIMPLE
This is sorta related to the maintaining scope thing, but more about the initial design of the game. The "base" scope that you want to at least hit that can be considered a game. In the case of Mechaburro, I have basically one type of character, levels that aren't tied together in any particular way, no dialogue, the hard requirement that there are always 8 burros on each level and mostly the same "game loop" applies throughout the game.
This helps in a number of ways, but one way that paid off was simplifying the act of coding. Sometimes flexibility introduces complexity which can lead to time wasted designing patterns that you may never actually need. For Mechaburro, it made things simple when I always assumed that there would be 8 burros per level and no duplicate burros. By "simple" I don't necessarily mean beautifully simple like a well designed API or anything. It's more like.. it's easier to write a system that can rely on certain constants that are enforced by the game design.
Aside from adding some initial placeholder items, the last big thing I added on Day 01 was the initial work of the title screen. I had experimented in the past with tiling textures and trying to scroll them. I wanted to scroll a texture but I honestly could not figure it out. Instead, what I did was tiled a texture on a large plane and then setup the plane to move slowly along a given axis and teleport back to the start to make it seem like it's scrolling. Yeah, I know, but it works.
At the end of the first day, the game looked like this. The Start button switched to an empty state and Quit exits the game.
Day 02
The second day I spent a lot of time aiming to get the basics of the game down. This was probably the day I had the most free time and made the most progress, so it's quite a lot!
First step was getting a burro moving and shooting. At this point, I was still debating whether I would try to make my own assets or use something free. I did see Quaternius showing off yet another amazing asset pack they made and was heavily leaning toward using something of theirs. I grabbed the donkey.glb from the Ultimate Animated Animal Pack and started working on movement.
If you've played A Day at the Movies, you may have noticed that movement system is comically bad. Players get stuck on walls, moving diagonally is faster and turning has this weird velocity factor in it so sometimes you can make tight turns and other times your turning radius is really large. Here's why: I'm terrible at math.
For Mechaburro I started off with the same movement system but tried to fix those two issues. The turning part ended up being related to the way I was calculating the velocity and integrating it into the rotation. Again, I'm not a math expert but I was able to get the donkey moving in a more predictable way by creating this "ZeroSignum" function to turn the acceleration into -1, 1 or 0 (based on player movement). The other piece I altered was removing the "deceleration" when the player stops moving. I wanted the controls of this game to be a little tighter, so you don't get that "why is this kid moving forever in a weird direction" feeling when you stop moving in A Day at the Movies.
The getting stuck on walls problem was because of how I was handling collisions where... if I detected that the position on a given axis is invalid, I shifted it into a valid spot and 0'd out the velocity on that axis. Instead of doing that, I just added some logic to transfer the velocity when this happens to the other axis, which can be seen here. I should mention at this point that most of my games rely on treating the game logic on only two dimensions because 3D is difficult and also I'm bad at math.
The last bit I added to the movement code was a little vertical bounce on the Y axis in lieu of trying to do any actual animation and because I thought it would be cute.
I also added a camera based on the example camera in the cheatbook, input handling using the awesome leafwing_input_manager plugin, initial code to handle "bullets" being shot and a way to make my game automatically setup walkable areas based on how the model is made in Blender. This last bit I struggled with.
In a Day at the Movies I tried making levels in Blender and then using a text file to specify the "AABBs" along with a height for that position, which lets the kids stay in walkable areas but also be able to climb up and down stairs. For Mechaburro, I wanted to do something similar without needing to write out the AABBs by hand (and also without the Y-axis since I was leaving everything in this game to just one plane).
I started out by using the Name component and loading my level geometry as Scenes thinking that I'd be able to add a label in Blender with some text like "walkable" and then find all the meshes once the Scene is loaded that have that text in their Name component. Unfortunately after I wrote all that out, I discovered that the Scene loader doesn't transfer the label to the meshes it spawns which made me sad (there's a PR open to add this which might be merged sometime soon though! :D)
So, instead, I setup code that looks for meshes whose "center" Y is less than zero. I figured I could make a level and then just pull down the areas that I want walkable until their centers are below zero and then this code would store it as a "walkable" area that the player code looks at for validation. And it totally works! And the best part about it is that in the end, I didn't even need it because all the level meshes I made were walkable. Still neat though.
Here's what that looked like
It was at this point that I suddenly realized that since I had hooked up all the player code to respond to the ActionStates in the leafwing_input_manager that making a bot was effectively just writing code that presses virtual buttons on the same set of actions. I proved this out and also realized that this is kinda an advertised use case of the plugin that I was completely oblivious to.
For the bots, I started out writing how I thought the bots should behave on paper and turning it into logic and then coded it up.. basically each bot has a number of cooldowns that are always running and when a cooldown hits 0, they'll find a new place to move to based on a series of conditions like their current health and what burros are near them and then press their "virtual button" for that frame based on those decisions. It was pretty terrible and the bots kept getting stuck in corners, but I was able to prove out that it was possible, I just did a bad job.
DON'T BE AFRAID TO TRASH YOUR TRASH
At some point I said "ok, 20 more minutes and if it's not good, trash it." I pretty much selected all of the AI logic I made and commented it out and started over with just "move to random place" and "look at each burro and shoot at one if it's aligned with you on the X or Y axis." It's a much simpler algorithm and a lot dumber AI, but in practice when the game is running in all the chaos it's not super noticeable and the burros no longer were getting as stuck on things. Don't make the mistake of falling into a sunk cost fallacy when jamming!
The very, very last thing I did was added hit detection. This is another one of those things that ties back to the keep it simple tip. I know the game will only have 8 burros, so making each burro look at the position of every other burro each frame is almost trivial. Likewise, there are only so many bullets that can be active at once when every burro has a cooldown and the bullets themselves expire. I could have done all sorts of complex collision detection but the simple "take each bullet and check if its distance to a burro is less than X amount, if it is, then it's a hit" is easy to code and performs well enough for the game. There's no reason to waste time on anything more than that.
End of day 2 looked like this:
Day 03
I don't know if I was exhausted from all the coding but Sunday morning I was just not feeling as excited about the game. I had this mental picture of it and while the logic was coming along I wasn't sure how I was going to make it look the way I wanted using the donkey model. I started the day with Blender and spent a few hours making a pretty OK pinata burro. I'm getting better at Blender but still feel very overwhelmed when I use it.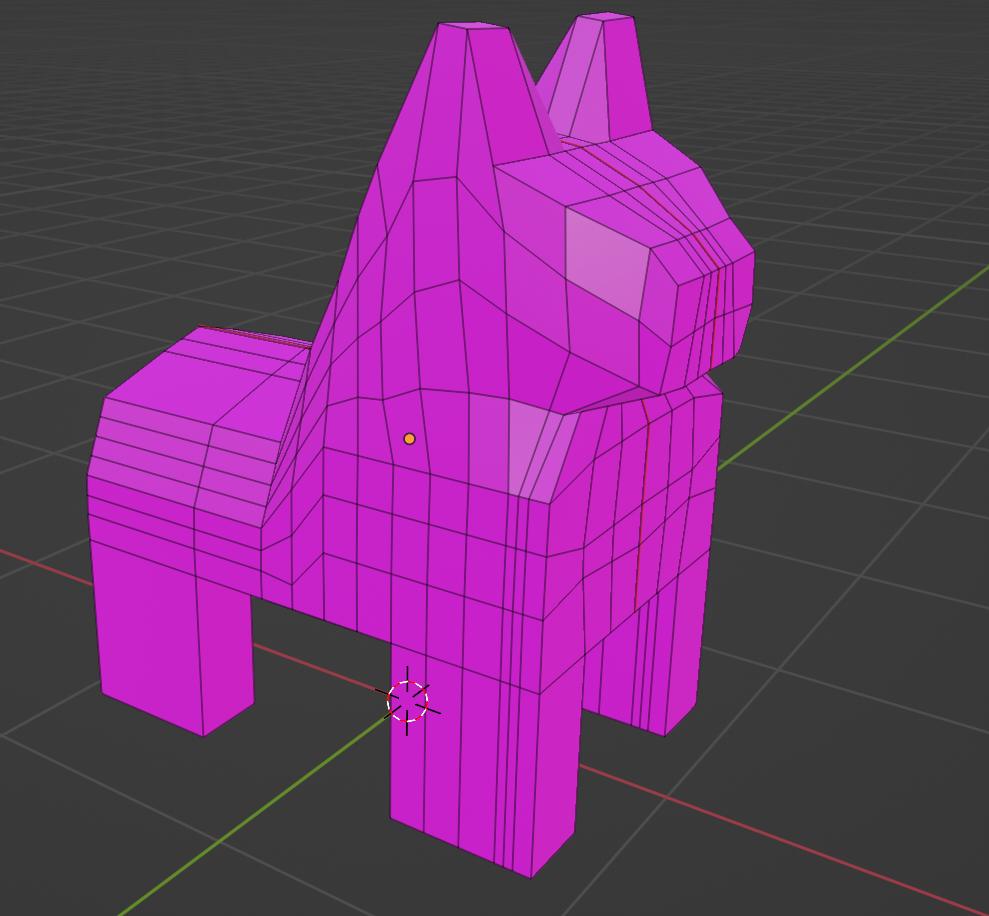
The nice thing about switching the model to a pinata means that the lack of animation actually becomes more realistic. You kinda expect a pinata to move by bouncing up and down statically, right? I'm sure there's a tip here about using your limitations to your advantage or something.
USE YOUR LIMITATIONS TO YOUR ADVANTAGE OR SOMETHING
The next part was adding a texture to make it look like a pinata. I was strongly contemplating buying a pinata to take a picture of the paper on it and use it but instead I just used the back of a paper towel and used Photopea (literally the best photoshop alternative ever made) to turn it into a texture. Using this and Blender's mesh paint feature I got something that looks like a pinata. I went back and drew lines with my finger to make it look like strips of paper and it is 100% convincing for sure.
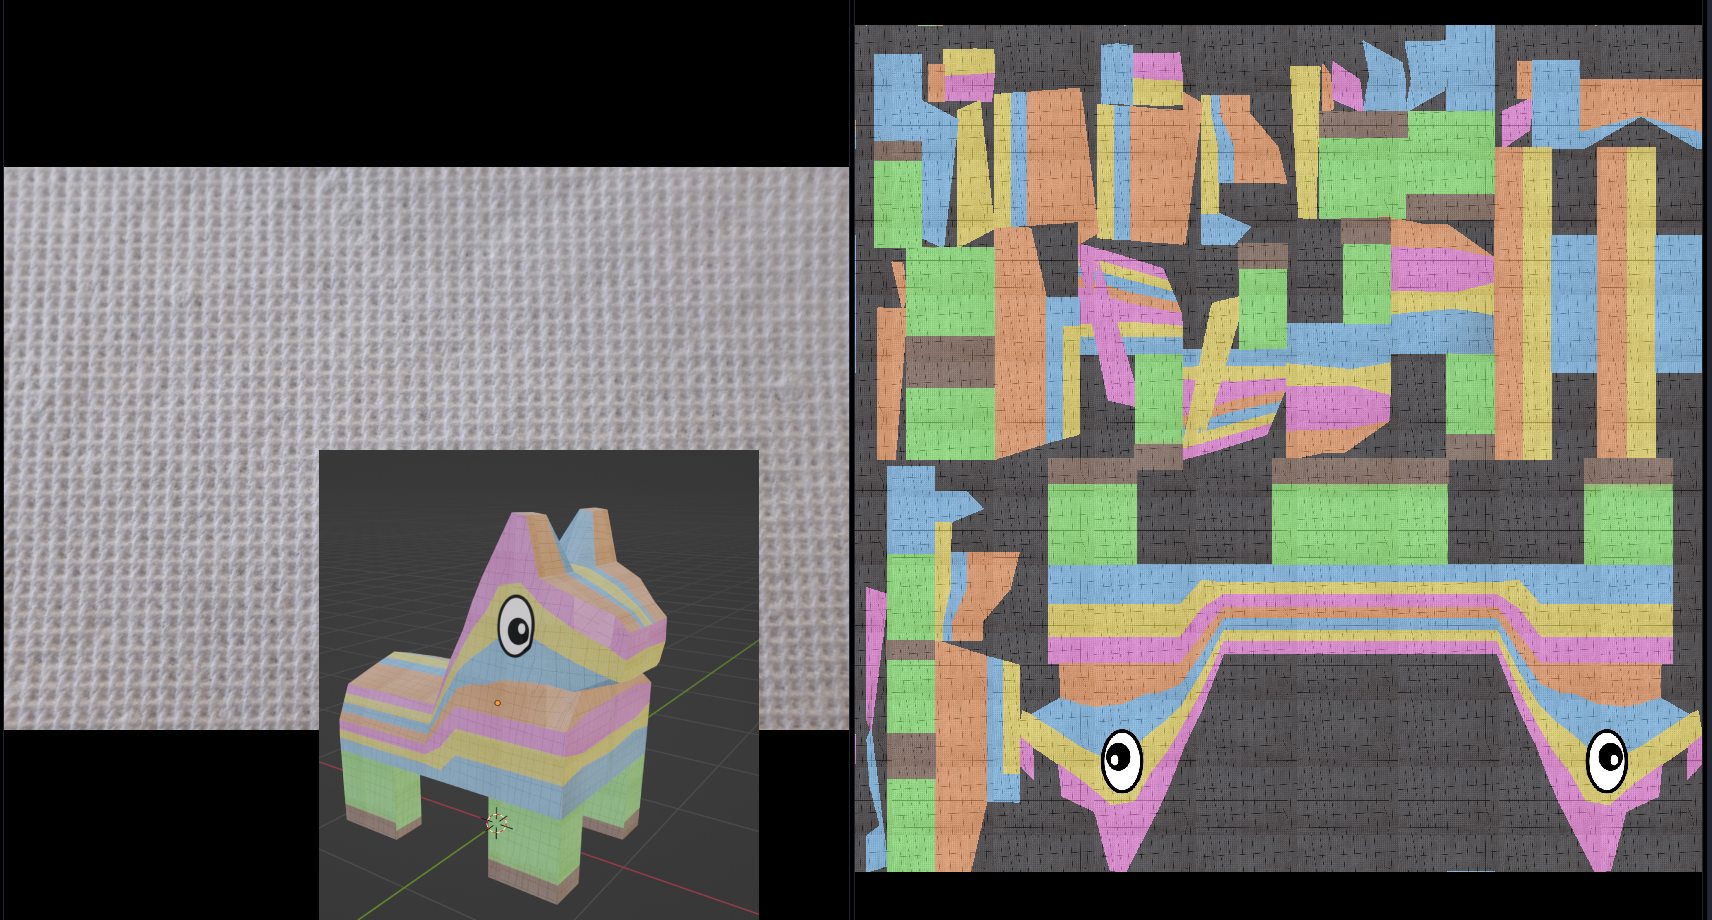
The next thing I did was using the same texture, made a number of "strips," in Photopea and duplicated them into overlapping layers and then colored each layer differently in order to make the background of the title screen (and this page). That was pretty simple and turned out ok.
I had setup the "floor" mesh to use a material and my plan was setup a texture that could be repeated across it to not waste time trying to paint every floor of every level. At this stage, I was trying to setup the process of making levels easy despite it still being a few days before I'd actually start working on the levels. My goal was to really simplify the process to "move blocks in blender, attach an image to it and export it" and have everything just work.
The pattern was something I haven't done before but knew how to approach. The trick is to make the horizontal ends align and the vertical ends align and then you can just fill in the center and when it tiles it appears seamless. I did an OK job on it, it's not perfect but for the most part it looks like it tiles well. Here's the Top, Bottom, Left and Right layers in Photopea.
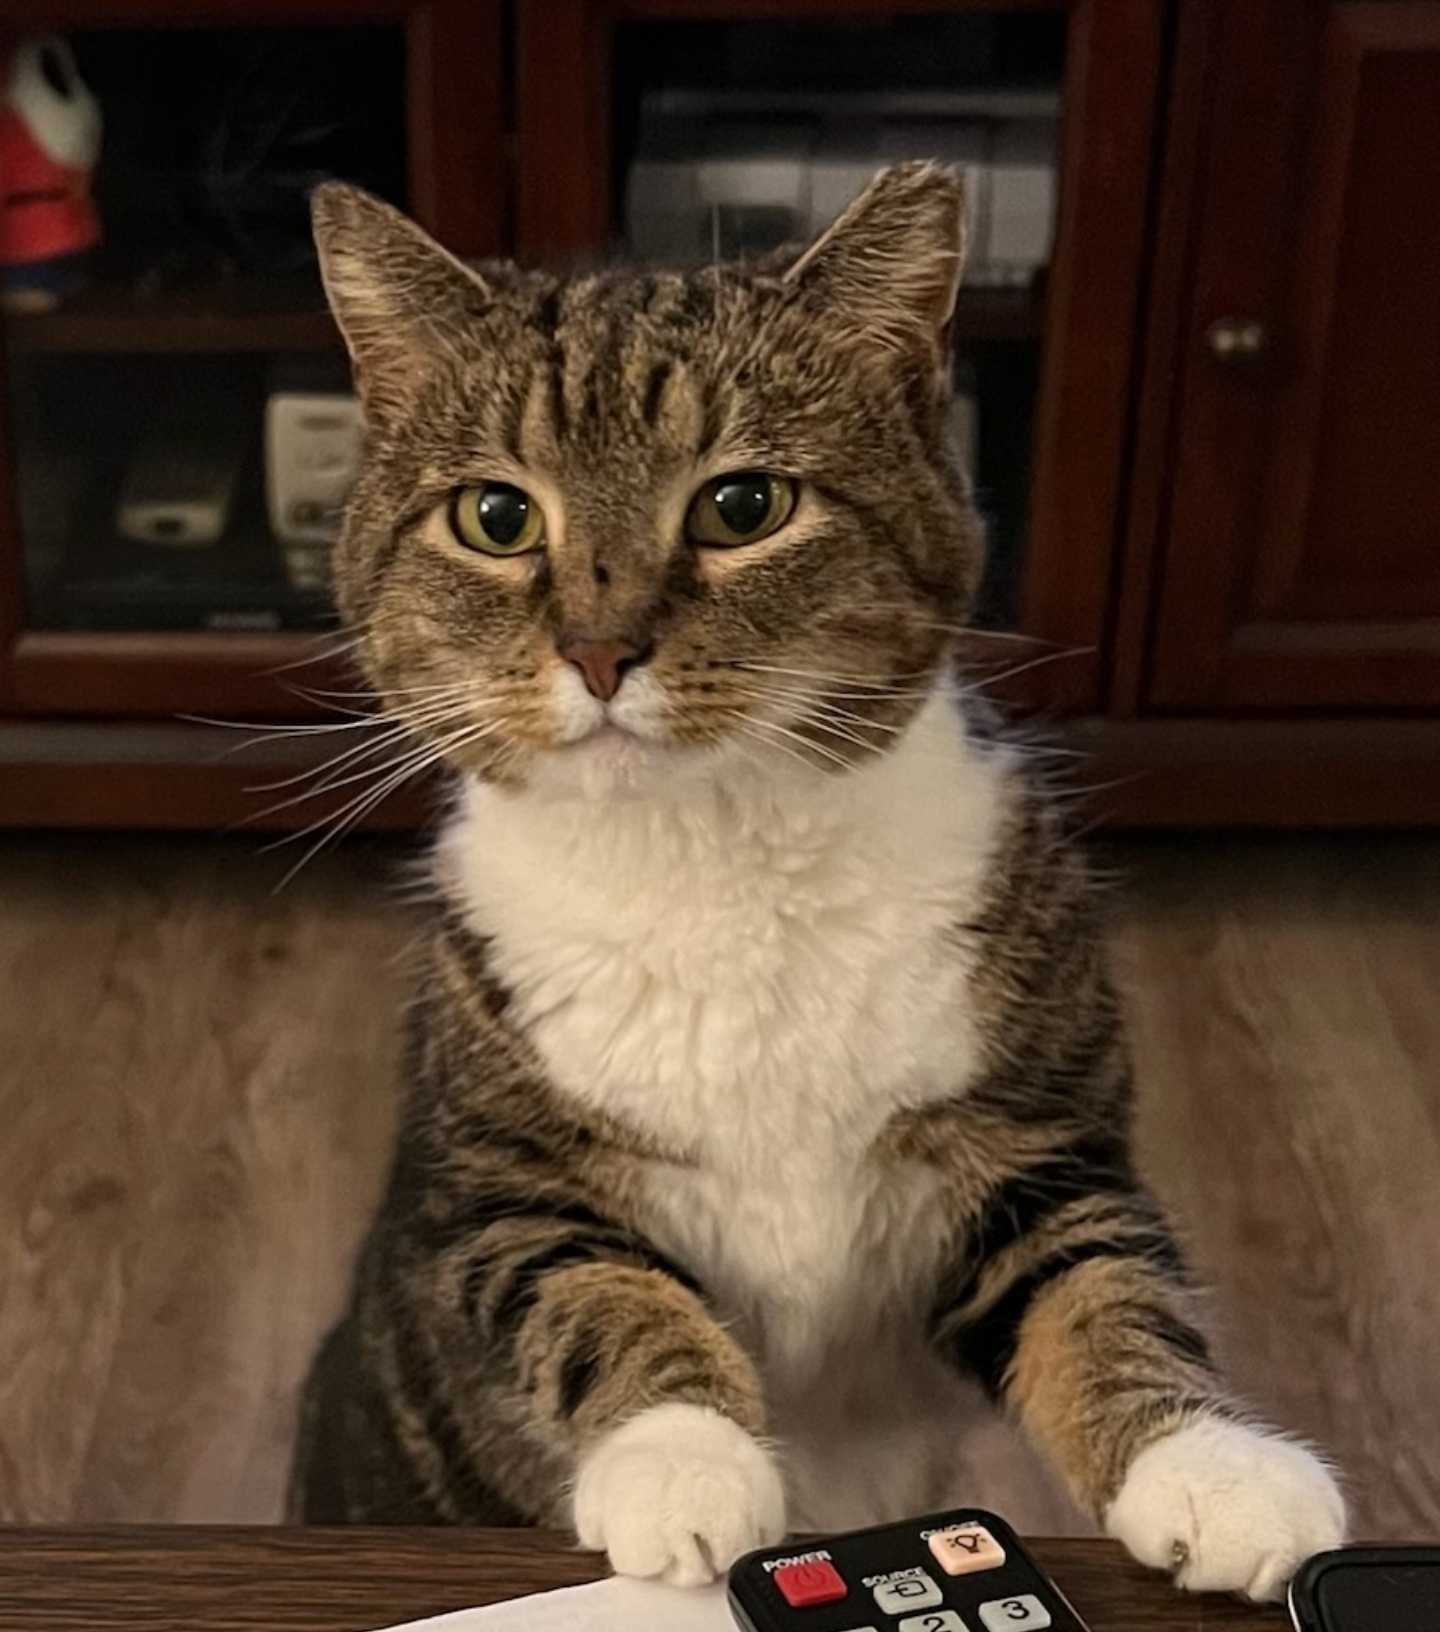
The next thing I worked on was making the 7 other burros using the Pinata texture. Once again, Photopea made this a pretty easy process by just loading up the original texture, selecting by color and replacing with a new color. Using a combination of eyeballing and Coolors I made textures for Salud (based on the pinata mascot from the brewery), Meow (based on my cat) and Gators (based on UF colors). Morir is just an inversion of Salud, Medianoche is an inversion of Meow and Aguas is an inversion of Pinata. Rather than inverting Gators, I made another texture for Mexico based on colors of the flag of Mexico.
LOOK AT MY CAT. LOOK. LOOK AT HER
There wasn't a lot of coding done today aside from changes to support the new assets but after looking at my little burros running around I was feeling a lot better about the direction of the game. This is my next actual tip
MINIMIZE PLACEHOLDERS
It's really easy to get things going using placeholders but you run the risk of not going back and swapping them out. This is why A Day at the Movies looks really weird. I thought I would go back and have time to apply actual theater-looking textures but instead I ended up with this
My suggestion is to just take time to reach a base-level of "quality" as you're adding assets. You don't want to waste too much time but you also don't want a giant pink nightmare in your game.
At the end of day 3, this is what the game looked like
Day 04
This day I started by creating the Mechaburro which at this point was pretty straight forward. I took a picture of my fridge and set that as the texture and used the same eyes as the other burros but colored them red.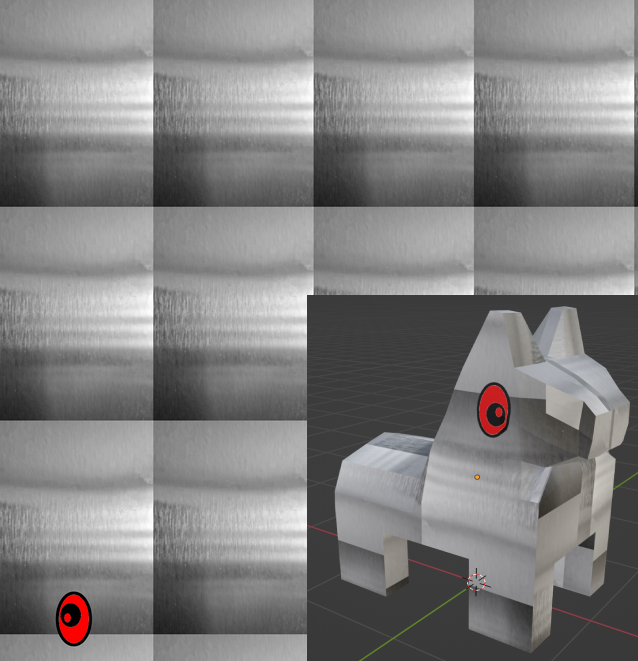
Adding the code for the Mechaburro wasn't too complicated at this point. I was still on the fence on what exactly should its benefits be at this point, but it wasn't too bad to add in just the one other bullet type that would be in the game. Again, knowing the scope of the game ahead of time made it easy to make these decisions and accept code that looked like this:
Managing cooldowns is something I never felt like I had a good pattern for and end up changing my approach in each game and in this game I think it's a good example of how I leverage the way I split files. For this game I tried to structure each "concept" as a plugin file and then have it added in main.rs. This kept a mostly flat folder structure and each plugin is somewhat isolated although there is a lot of use statements across files which I don't care that much about for my games.
You can see my main file is mostly hooking up the plugins and exposing just a couple crate-level functions, like a generic cleanup, that I make use of in multiple files. For the most part, each file has the plugin that adds systems/system sets, a file-specific cleanup struct that I add to everything I'm spawning in that file, whatever structs/system implementations are needed and then a resource to hold relevant meta information, like cooldowns for things like the selection of the Mechaburro.
I used to start these structs based on examples I found like this
struct SomeTimerHolder(f32);
struct MetaStuff {
    timers: (f32, f32, f32, f32),
}
Which is great for creating quickly without worrying about naming but I found that this is just setting yourself up for trouble, especially during a game jam, because it's really easy to continue the bad pattern and end up with a confusing mess like this thing I have in Not Snake
and you end up with confusing code that uses it like this
Seriously, what kind of monster writes code like that??
DON'T CUT CORNERS THAT WILL CONFUSE YOU
Just take the extra time to name your variables/fields and you'll thank yourself later on.
Anyway, I try to create a resource struct within each plugin to store information that may be useful across multiple systems, such as cooldowns, and I started managing the cooldowns like this
fn some_system(
   time: Res<Time>,
   some_struct: ResMut<MySomeStruct>,
   // other parameters
) {
   some_struct.name_change_cooldown -= time.delta_seconds();
   some_struct.name_change_cooldown = some_struct.name_change_cooldown.clamp(-10.0, 3.0);
   if some_struct.name_change_cooldown > 0.0 { return; }

   // actual system stuff here
}
This is OK and you'll see this pattern a lot in my code. The other thing you'll see occasionally is my use of SystemSets to mark a list of systems to run when entering/exiting/during a State. The problem I ran into a couple times is when I ended up with sets that I wanted to run as sets in multiple states, I'd end up copying and pasting the list of systems like you can see here.
It's possible I should be using RunCriteria more. I haven't used them a ton, but I think both of these situations could be good use cases for them. I might be wrong (let me know in the comments).
The large point of this section is
IF IT AIN'T BROKE, DON'T FIX IT
This should be pretty straight forward, don't waste time trying to make something more "correct" if it's fine as is and is understandable and you're used to it. If I was working on a team, I would most likely bring this up and see if there's a better pattern. But, since I'm probably the only person that will be looking at this code and I recognize the pattern, it's OK in my book to stick with it.
The last thing I tried to do on this day was add camera shakes but I honestly could not figure it out. I left it in place with low settings to fix an issue I was seeing with lighting and the camera where the light wouldn't really "activate" until I rotated the camera. This is something I want to circle back on and try to understand more, but just doing a very, very small rotation fixed it so I just moved on with that and left the shake code in but mostly disabled.
This is what it looked like at the end of day 4 (notice the lighting difference)
Day 05
This day mostly focused on UI work including making icons for all the burros, positioning text and adding the main title screen text. For the last one, I asked my girlfriend for assistance (and it turned out amazing!) and I took screenshots of the burros and used Photopea again to make the icons and the heart icons which wasn't too bad. I struggled a lot with getting the positioning of everything.
I know the basics of flexbox but I still have trouble positioning things exactly where I'd like. My computer isn't powerful enough to run the game well at fullscreen, so I usually run it in a smaller window while working and then see what it looks like fullscreened and then try again. I initially wanted to have 4 burros on top and 4 on the bottom but gave up and just left them all at the top which turned out ok. The biggest thing that helped me was just using pixels for margins. The consequence of this is that at higher resolutions the UI appears smaller but I decided it was OK for a jam.
I'd like to get better at this and don't want to say that the way I did this is the right way, but did get a lot of practice during this game. The best one is probably in the ingame_ui.rs file.
The other really important thing I did was making the burros have a little "animation" when they shoot. Bevy currently doesn't support skeletal animations which is great because I actually am terrible at skeletal animations, but I did want some movement. My friend Dana is an animator and told me that "squash and stretch" is an easy way to make stuff look cool. The key is to pick two axes (the plural of axis is axes) one to stretch and the other to squash and you leave the third axis alone. This makes the object look like it's retaining the same amount of mass but has some motion.
So, whenever a burro shoots I also do this, which immediately sets that burro's X axis smaller and Y axis bigger.
transform.scale = Vec3::new(0.7, 1.4, 1.0);
and then in the code where I'm handling the burro movement, I have this code that checks if the scale is not 1.0 on the X/Y and if it's not it slowly moves toward 1.0 using a lerp with the current frame's delta seconds. I then check if it's close enough and set it back to 1.0 for everything and the "animation" is over.

This is like, the incorrect way of using lerp apparently as what you're really supposed to do is something more like this
starting_point.lerp(target_point, current_animation_time / total_animation_time);
Which will make your animation always reach the target exactly on time and it'll be a smooth transition. The way I wrote it above suffers by not being consistent (since it's based off of frame times) and that the animation slows down as it gets closer to the target. I think it also technically would never reach the target. The benefit with doing it the wrong way though is you don't have to manage those extra variables of "the current time of the animation" and "the total animation length" as well as incrementing the current animation time.
That code makes the burros look like this when they shoot
Which is good enough for me and I doubt anyone would really notice too much.
At this point the game is playable up until the end of the one level I've added. Here's what it looked like
Day 06
At the end of each round I wanted to display the scores from that round and then the total accumulated score for the game so far. I basically copied the ingame-ui.rs file into a new one and changed it to display it in the center of the screen. I then added systems to detect when the burros died and use that as the score. I wrote this thing which I thought was neat and terrible for counting up the score based on the order that the burros were eliminated.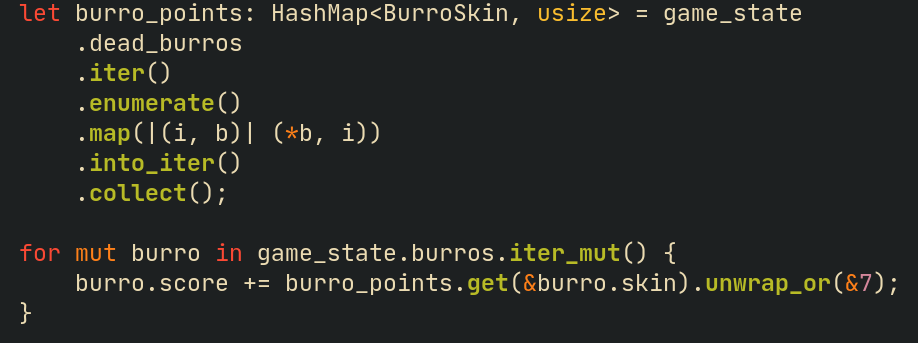
I don't like to look directly at it because I know I'll throw up in my mouth a little bit but it works so that's all that matters. It's a little tricky because it is based off of just the skins and if the list of skins in the dead burros doesn't have the current skin, it just assumes that's the winner. I'm not entirely sure what happens when a round ends with multiple burros, but that's fine since it will just be unfair whatever it is.
There was also this large section for handling when the scores get displayed that I messed up and don't fully understand anymore and now have prefixed with this:
Which you can see here.
I copied the code I had for displaying the selected Mechaburro and used that in a new file to show the end-of-game winner when the current level exceeds the number of levels that exist. I started running into issues trying to circle back to the title screen so I wrote this wonderful code which I highly recommend.
Most of the changes were for after the round/game ends.. the game is almost done at this point (except for adding levels). This is what that part looks like:
Day 07/08?
So, honestly toward the end here I effectively kept working until I fell asleep so there's some overlap of days and I also was starting to get some of the files mixed up (especially the burro, the player, the bot and the game_state ones). Some of the last things I did here was switching the flat level for another one I made in Blender that mostly worked like I had planned ahead of time.
I did change some of the bot behavior as they started hugging the walls a lot and getting stuck on corners. At this point the algorithm is "find a random walkable spot" and if they run into somewhere they can't walk, just find a new spot. Again, really simple but works well enough.
I briefly attempted to add some scrolling text in the background but I could not get it to work and gave up although there's still some code setup for it left in the game.
Here's a good tip:
GET PEOPLE TO PLAY TEST IF YOU CAN
This is a lot easier if you've already got your CI/CD system setup and your game's page. For me, I sent the link to a couple friends and the main feedback they got was being unable to tell which burro they were. It was very easy for me to add a "FollowText" based on aevyrie's world_to_screenspace repo that got merged as a PR here which I always thought was super helpful (I used it in the Day at the Movies and Not Snake).
So, I just added a "P1" floating above the player's burro. At this point I was still VERY optimistic that I'd get local multiplayer working and didn't want to block myself.
I also added the little intro clip for each level that shows the selected burro getting changed that way it's a little more clear what it means to be selected the Mechaburro. I used a similar structure to timing the score display to time the stuff for this and it turned out a little better, you can see it here. The idea is that it keeps getting called and every time the cooldown hits 0 it switches to the next "state" of the animation.
To go along with this, I made changes to the camera that allowed me to move it more easily. Since in this game I'm mostly just orbiting around a specific point, I made it so I just pass the camera struct a point, a radius around the point and a height and it orbits around that point. If I don't want it to orbit, then I just set the camera to look up the X axis.
I'll mention again here I'm pretty bad at math but I'm getting better at rotations! Among the many tabs I have open while making a game is this one. If I ever get a tattoo, it would probably be this and hopefully I'll eventually memorize it.
I used this to zoom in on the winner at the end of the round but I messed it up and it just like freaks out at first.
I figured it was good enough for the jam. I realized while writing this that it's because I forced the current radius and the target radius to be the same so it like... goes straight to the burro on the X / Z coordinates but floats down to the target height on the Y coordinate. It was simple to just add another query to get the camera's current distance from the player each frame so it slowly approaches and orbits the winner.
And it now looks like this (this is post jam)
I've gotten feedback that people like the weird dizzy end-round camera so I'm on the fence about what to do with it but... I probably will keep it like this so it looks less janky?
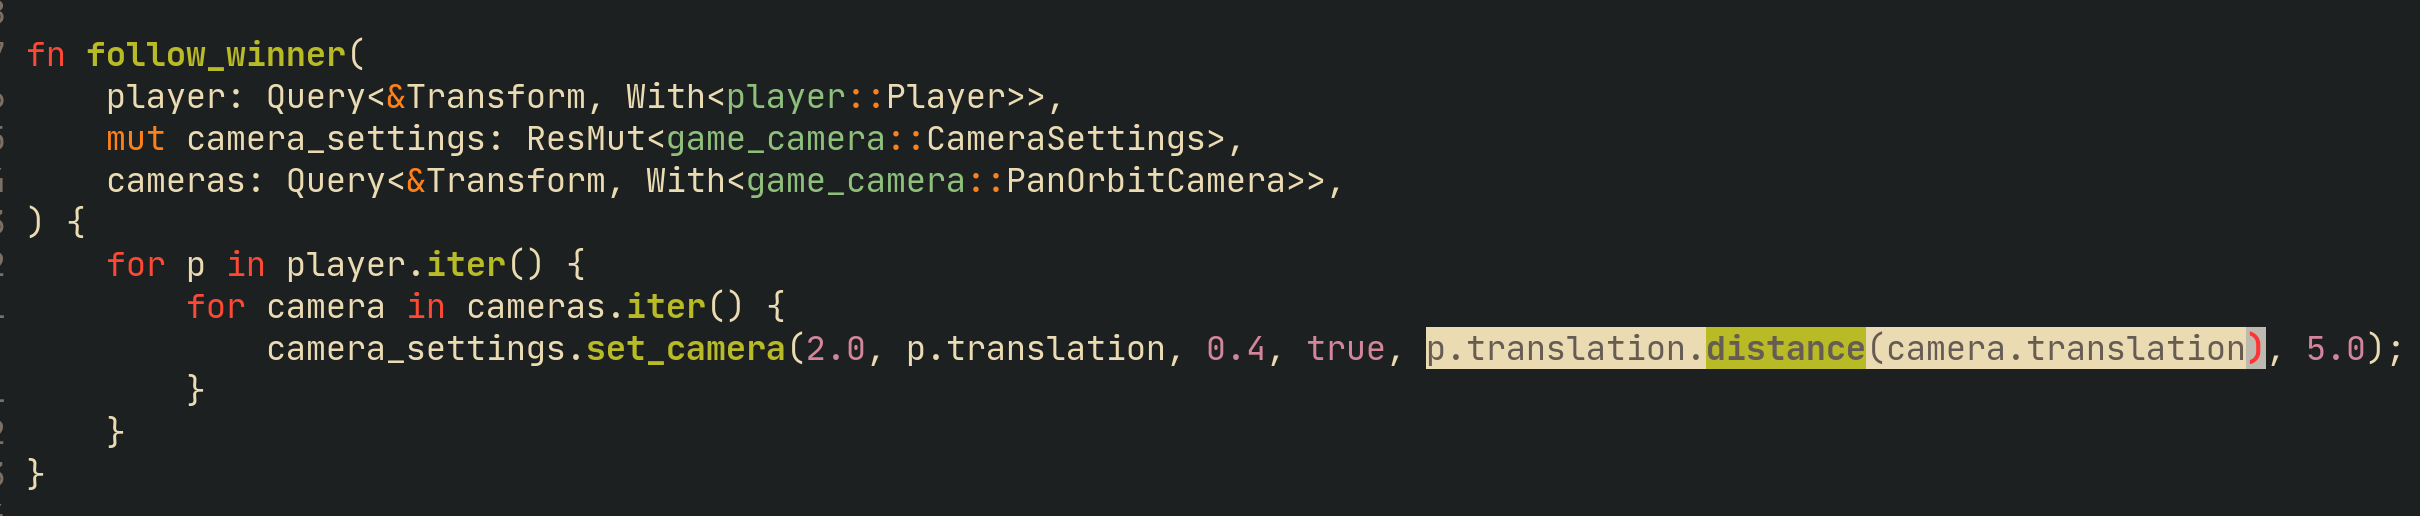
I do want to take a second here to point out the code in the above image is a good example of what I love about Bevy with Rust. Just looking at the parameter types of a system gives you so much information about what the function does. Like, you can see it's getting the positions of the player and the camera and you can tell it's only modifying the CameraSettings because of how Rust works so it must be deriving something from the other two collections and updating this CameraSettings object.
fn ???(
   ?: Query<&Transform, With<Player>>,
   mut ?: ResMut<CameraSettings>,
   ?: Query<&Transform, With<Camera>>,
) {
}
I enjoy so much just being able to write functions that are just querying the world; it's just for me what makes Bevy and Rust such a joy to work with.
Anyway, I added little hit cubes that spawn when a candy hits a burro which can be seen in hit.rs that is based off of the dust I had in Not Snake.
The last big piece was multiplayer. I started by setting up a screen for the player to pick their burro, split into four (again making use of the radians image to position the burros correctly!). All was going well until I took out my controllers to test the input plugin across multiple controllers and ran into a bunch of issues.
I'm not sure what happened, when I first implemented player input it worked perfectly with a controller but now I was running into issues where the D-Pad doesn't get detected and the buttons were switched between controllers. I spent some time looking it up but decided to just implement another controller layer that calls the existing input layer similar to how the bots call a virtual gamepad to control the burro. It's unfortunate and was somewhat stressful, but in the end I still think it was well worth using the input plugin because it made everything up until this point super easy.
Again, since I was really optimistic with my coding, I had a lot of the logic already in place by having all the burros have a boolean on whether they're human players or not and a lot of logic treats the burros the same regardless if they're players or not anyway.

I only have two USB ports so I actually don't know if player 3 and player 4 work. I didn't really test multiplayer beyond seeing that one controller moves one burro and the other moves a different one. I'm very thankful for funbasealpha including the game in their stream of the bevy jam games to actually see the local multiplayer work. The best part of making games is seeing people play them!
The last few tasks were just creating the levels, swapping the textures on the levels and adding music. I spent about an hour on it before I decided to call it and use a track my girlfriend found on YouTube's Audio Library which fit the game perfectly. If I had more time, I really would have liked to make my own cumbia but I was pretty exhausted at this point and didn't think I could do the game justice.
The last day I took a half day from work just to make submitting the game less stressful. The game wasn't exactly how I initially imagined it, but I am really happy with how it turned out. I was hesitant to do another jam after the last one, but this was 90% a positive fun experience I'm somewhat looking forward to the next one.
What would I have done differently?
I'm not sure I would have done anything too differently. I think things went better than I expected. The game didn't quite turn out like I imagined initially but I'm pretty happy with it.
I will say though, I really wish I had made use of the bevy-inspector-egui crate. I had gone through adding it and setting it up and then didn't make much use of it. Post-Jam submission it was helpful for resolving some bugs though. I created a struct just store some effectively "global variables" that I use to drive behaviors in the game and then it lets me tweak/balance the game a bit without having to re-compile. Since it's backed by just a struct that is a Resource, I can easily grab it in any system and use the values from it.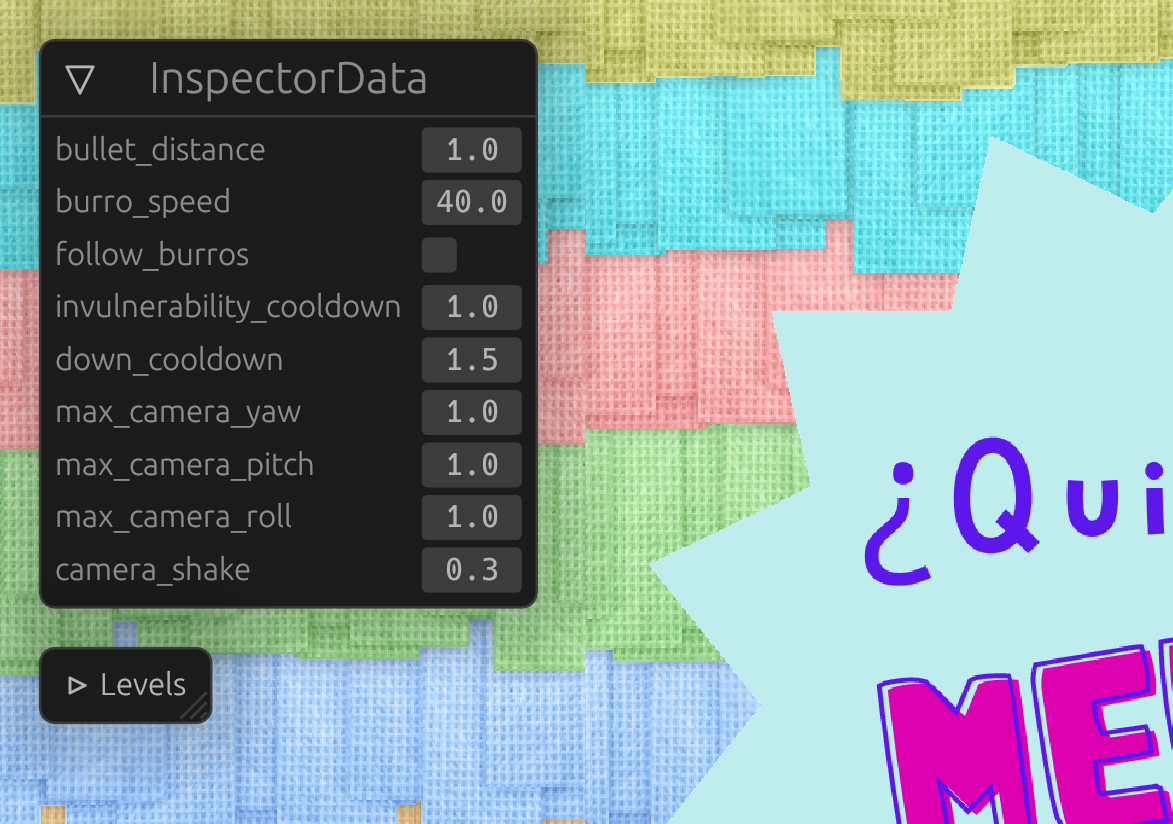
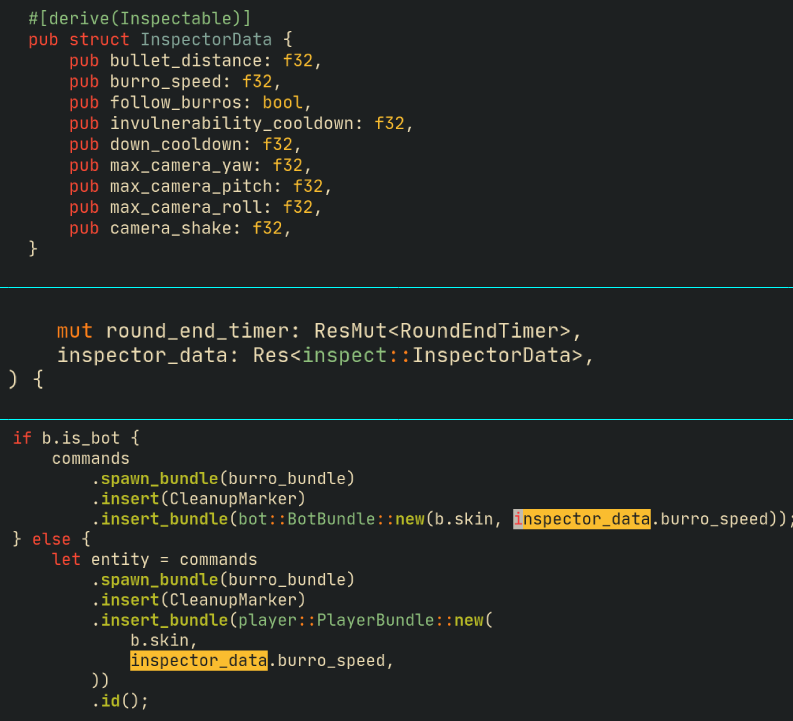
I'm definitely going to be using this a lot more moving forward.
What's Next?
As I mentioned above, I did start fixing a couple bugs and am entertaining the idea of continuing working on the game. Obviously, I have a list of things I wanted to add which I'm sure is not unusual for a game jam game.
I did finally play my game on a 144hz monitor and instantly realized I had a terrible bug where everything was the correct speed except the burros were moving super fast. This was the classic missing time.delta_seconds() multiplied against a velocity that just happened to turn out alright on ~60ish fps. Resolving this one took some time because I actually had a separate bug where I had added the bullet handler systems twice which made them effectively go twice as fast (and also spawn two bullets for every bullet) which had me confused for some time.
I want to make the game a little less chaotic and easier to tell when you've been hit/have hit another burro. I started off by working on making the burros fall when they get hit and "smoke" when they get hit with lasers. You can see that in this clip.
This is still a work in progress; I'm not sure if this is an improvement or not but it feels a little clearer what is happening. The current version of the game on itch.io (v1.0.6) has the above features in place so you can check it out if you'd like.
Other things I'd like to add is different level types, similar to Mario Party mini-games. And I want to add some shaders in the background so it's not just a solid color, but I also don't want it to be too distracting. I'm also not great at shaders so who knows how that will turn out. I've also started the process of writing some cumbia music because if I'm going to expand the game, looping one awesome track may no longer cut it. It'd also be cool if the music changed with how many burros are left and that kind of thing.
Again though, we'll see how long I decide to work on this before getting distracted with another game idea ¯\_(ツ)_/¯
If you've made it this far, thanks for reading! I really appreciate it and hope you got something out of it. Let me know in the comments any thoughts, criticisms, suggestions or compliments for my cat. Cheers!
Comments
Log in with itch.io to leave a comment.
Excellent write up! The tips reflects very closely my experience during the jam. And you have a very nice cat.